
Tools and Materials Needed
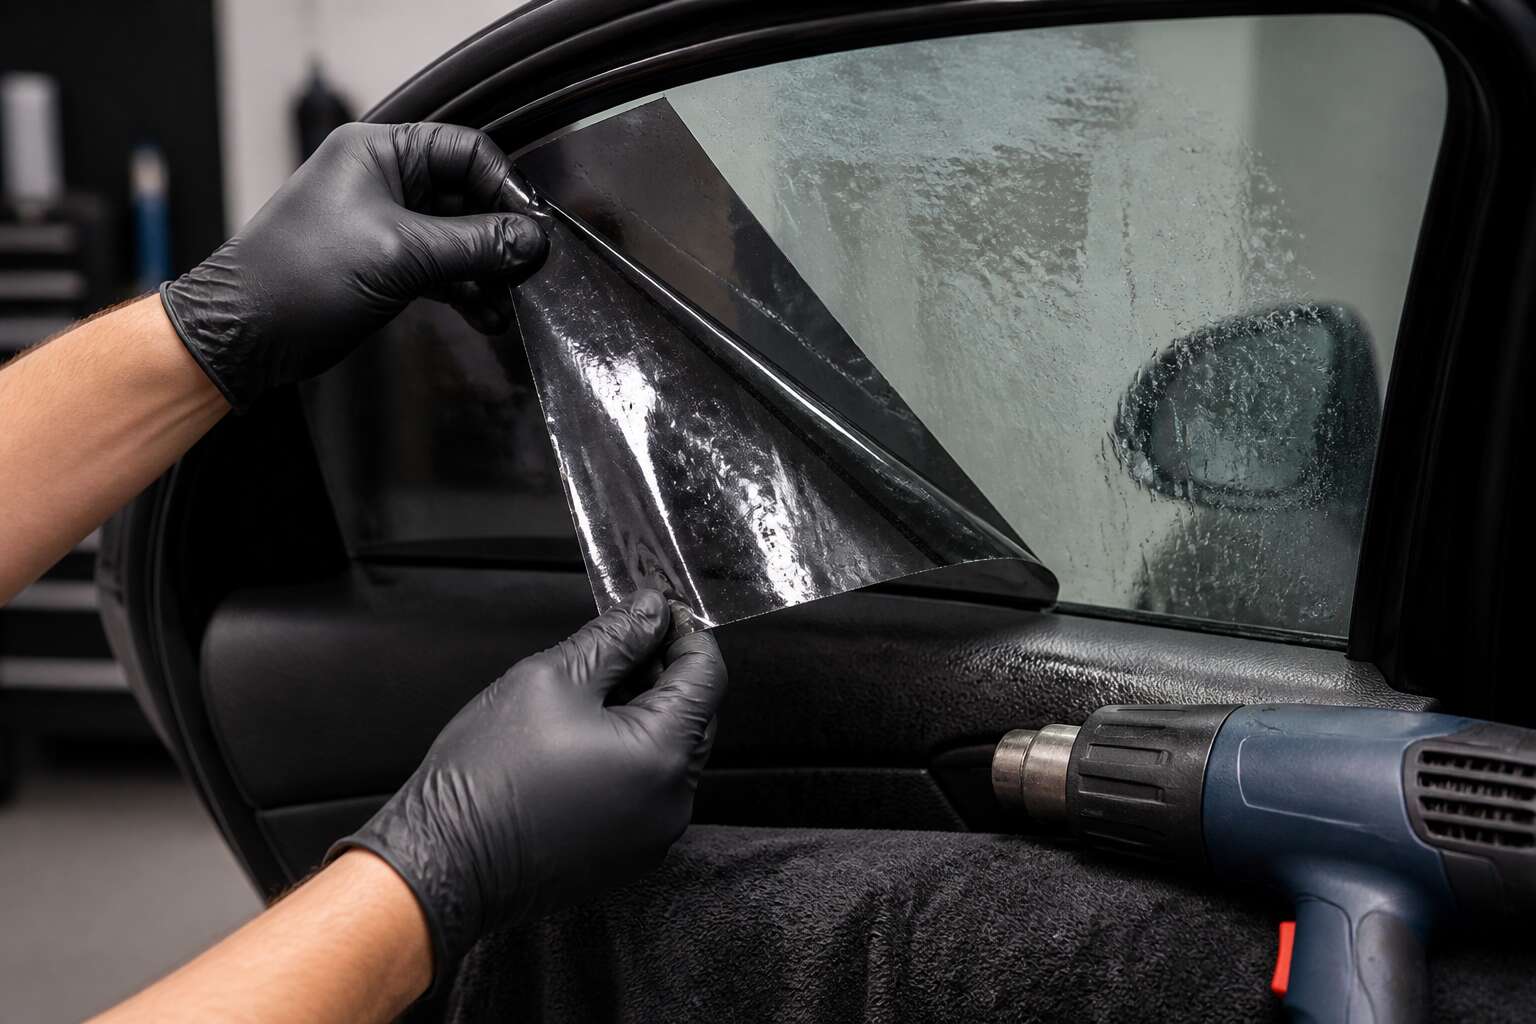
Essential Tools for Tint Removal
Assembling the correct tools changes everything when you learn how to remove window tints from car. I have watched people struggle with flimsy scrapers and weak heat sources. A heat gun or steamer softens the adhesive that keeps the film fixed to the glass. Razor blades in proper holders give you the precision to lift edges without scoring the surface. Ammonia, a spray bottle, and heavy-duty trash bags complete the core setup.
The quality of your tools matters more than their quantity. Cheap blades bend. Weak heat sources drag out the process. Buy equipment that performs.
- Heat gun or handheld steamer
- Razor blades with sturdy holders
- Ammonia solution and spray bottle
- Black trash bags or cling film
- Adhesive remover and microfiber cloths
- Protective gloves
Gloves prevent ammonia burns. Microfiber cloths collect leftover residue. Understanding how to remove window tints from car means respecting the materials involved and preparing for what the adhesive demands of you.
Choosing the Right Adhesive Solvent
Some say the tint comes off easily, but they have never met the stubborn residue of a ten-year-old film on a Durban windshield. The solvent you choose for this task is a matter of chemistry and patience.
Ammonia works well, but it is not a universal charm. For example, a steamy pretreatment can make the adhesive more receptive. Alternatively, a petroleum-based adhesive remover suits certain films better. A small corner test reveals exactly how the adhesive will react, which matters when the glass already carries stress cracks from the highveld sun.
- Use ammonia in a well-ventilated space.
- Choose a gel solvent for vertical surfaces.
- Match the remover to the film’s age and type.
Understanding how to remove window tints from car means respecting that each adhesive has its own preference. That is the quiet art of removal, and it saves you from turning a simple job into a weekend of scrubbing.
Heat Sources and Their Application
Heat is the unspoken agreement between the glass and the old film. A heat gun on its lowest setting works, but the Durban sun has already done half the work. For stubborn adhesive, I prefer a handheld steamer. It softens the glue without scorching the window. You feel the film’s grip falter when the warmth penetrates, then the edge lifts cleanly.
- Work in small sections, no larger than your hand spans.
- Move the heat source in slow circles, never resting on one spot.
- Peel at a low angle, keeping the heat ahead of the tear.
The equipment matters less than the rhythm. Too much heat cracks the glass. Too little leaves the tint torn and stubborn. Understanding how to remove window tints from car means knowing that heat is a patient negotiation with years of South African summer. The film softens when it is ready. That patience is how to remove window tints from car without grief.
Protective Gear and Equipment
Nobody warns you about the glass dust. When you learn how to remove window tints from car, the first lesson concerns the body doing the work. The old film crumbles into fine particles, and the adhesive releases fumes that linger in the cabin. Safety glasses are non-negotiable. A respirator with organic vapour cartridges keeps solvent smell from settling in your throat. Nitrile gloves, the thick kind, give your fingers the dexterity to grip the film’s edge while shielding your skin from irritation.
I keep leather work gloves nearby for handling broken glass, though I hope never to need them. Wear long sleeves. The shards find exposed skin.
- Safety glasses with side shields
- A respirator with organic vapour cartridges
- Nitrile gloves and leather work gloves
- A long-sleeved cotton shirt
That armour turns a messy job into a deliberate craft.
Preparation and Safety Measures
Cleaning the Windows First
Preparation and Safety Measures: Cleaning the Windows First
A single grain of dust caught under your scraper will leave a permanent scar on the windscreen. This is why cleaning the window first matters more than any solvent or heat setting. Use a pH-neutral glass cleaner and a fresh microfibre cloth, working from the top edge downward so grit never gets pushed into the corners. The perimeter deserves the most attention, as old adhesive tends to cling there.
Once the pane is dry, inspect it for hairline cracks or chips. These flaws become more dangerous when you apply pressure later, and a clean surface lets your scraper glide smoothly instead of snagging. Learning how to remove window tints from car involves respecting what lies beneath the film, and that starts with a properly prepared pane.
Setting Up a Well-Ventilated Workspace
Chemical solvents release vapours that stratify into invisible layers, hanging at breathing height until you force them out. A garage that feels draughty is your ally. When you set out to learn how to remove window tints from car, air movement matters as much as the blade in your hand.
Open the garage door before you open the solvent bottle. Crack a window on the far side to create a pressure differential that pulls fresh air across the workspace. If you work in a carport or driveway, angle the vehicle so the prevailing wind carries the fumes away from your face. Your nose will tell you when the air has gone stale. Listen to it.
Protecting the Interior and Exterior Trim
The solvent that frees the film will happily eat into door cards, seatbelt webbing, and rubber seals. Before the first drop falls, mask the trim with wide painter’s tape. Plastic sheeting tucked behind the window scraper catches the runoff. When you plan how to remove window tints from car, the trim needs a defence before the blade ever moves.
Consider removing the door panels entirely when chasing the tint to the edge. Stubborn adhesive pulls fibres from your upholstery. Protect the exterior as well. The blade will scratch paint if allowed to wander. Tape along the frame gives you a boundary.
- Wipe the door sill after each window.
- Inspect the weatherstripping for solvent film.
I have seen a clean removal turn into a reupholstery job. That is why anyone serious about how to remove window tints from car treats the interior and exterior trim as part of the work, not an afterthought.
Understanding Window Tint Types
Preparation begins with knowing what you are cutting away. Factory tint lives inside the glass itself, a metallic dye fused at manufacture. Aftermarket film clings to the surface, a polymer skin with its own temperament. The difference changes your approach. One needs patience. The other needs pressure.
Before you learn how to remove window tints from car, you must read the glass. Common aftermarket films fall into three families:
- Dyed film, which fades and becomes brittle
- Metalized film, which reflects heat but resists tearing
- Hybrid film, a compromise between flexibility and strength
Each behaves differently under the heat gun. Each leaves behind a different adhesive. Inspect the edge carefully. If the film lifts easily at the corner, you have a simple job. If it cracks and fragments, you are dealing with a brittle polyester that will demand slower work.
Safety Precautions with Chemicals and Heat
Preparation is a sequence of small decisions that compound into safety. Before you learn how to remove window tints from car, understand the relationship between your solvent and your heat source. Many solvents contain volatile compounds with low flash points. A heat gun set too high turns a routine strip into a fire risk. Set it low, keep it moving, and never point it at a surface still wet with adhesive remover.
Run a pre-flight check before touching the glass:
1. Confirm the solvent label lists a flash point above 40°C.
2. Remove metal jewellery that can conduct heat.
3. Keep a bucket of water within reach.
4. Ensure your gloves resist the exact chemical you are using.
The South African sun adds a variable. A car baking in direct sunlight reaches interior temperatures that soften adhesive, which sounds helpful but is dangerous. Work in the early morning or late afternoon. High humidity drags out evaporation. Wind brings fumes toward your face. Control the environment first, then the film becomes a small problem.
Step-by-Step Removal Techniques
Using a Heat Gun and Peel
The moment the heat gun meets the tint, the film begins to breathe. Work in small sections, no larger than a handspan, and keep the nozzle moving in a steady circular motion. This prevents the glass from absorbing too much thermal shock. When the edge lifts, slide a razor blade or fingernail under the corner. Grip the film firmly with both hands and peel downward at a forty five degree angle. Pull with even pressure, not a yank. The adhesive should separate cleanly as the heat softens its grip.
For rear windows, pay attention to the defroster lines. Peel along their direction to avoid lifting the conductive silver traces. If the tint tears, reheat the broken edge and start again. A steady rhythm of heat and pull works better than aggressive force. This is the practical reality of learning how to remove window tints from car. Each pass reveals more glass, and the residual adhesive often clings to the glass in faint patches. That is part of the process, not a failure.
Steaming the Tint
Steaming offers a gentler route for anyone learning how to remove window tints from car. The moisture works into the film, softening the adhesive without the same thermal stress a heat gun creates. I have found that a handheld garment steamer handles this task well.
Follow this order:
1. Fill the steamer and let it heat fully.
2. Hold the nozzle a few centimetres from the glass.
3. Move it slowly along the top edge of the tint.
4. Lift the corner with a plastic scraper.
5. Pull the film downward while directing steam at the separation line.
The steam condenses on the glass, and that water helps ease the adhesive away. Work in small spans. Rear windows respond well to this method because the moisture prevents the defroster lines from lifting.
Soapy Water and Razor Blade Approach
The soapy water and razor blade approach suits drivers who want to avoid heat. For anyone learning how to remove window tints from car, this technique depends on steady hands and constant moisture. The soap weakens the adhesive while the blade lifts the film. A razor blade held flat against the glass prevents scratches.
I use a simple mixture of warm water and dish soap. Spray it on generously before each pass. The liquid seeps under the film and keeps the adhesive soft. Work from a corner and slide the blade forward, never backward. Keep the glass wet throughout the process.
- Mix two drops of dish soap into a litre of warm water.
- Spray the tinted surface until it drips.
- Lift a corner with the blade tip.
- Push the blade beneath the film in long, even strokes.
- Wipe away the loose film and reapply the mixture.
The blade handles the lifting. The soap handles the bonding. Together they remove the tint without leaving scratches or sticky patches. The finished glass looks clean.
Applying Commercial Tint Removers
For anyone learning how to remove window tints from car, commercial removers offer a quieter alternative to the heat gun. These solvents break the adhesive bond chemically, which means the bottle does the work while you stand there looking patient. You spray, you wait, you peel. That is the entire process.
Grab a spray bottle and saturate the film until it drips down the glass. Give the chemical its dwell time. I usually wait ten minutes, enough for the solvent to soften the glue beneath the film. Lift a corner with your fingernail, then pull in one steady motion. The tint should separate in one sheet.
Stubborn sections respond to a second coat. Use a plastic scraper to nudge the edges. Metal tools will leave permanent lines.
- Spray the tint generously.
- Wait the full dwell time.
- Lift a corner to test the bond.
- Peel the film in one continuous pull.
Commercial removers cost more than soapy water, about R200 to R400 per bottle. For the impatient driver who wants to learn how to remove window tints from car without touching a heat gun, that is the appeal.
Troubleshooting Common Issues
Patience does most of the work when you learn how to remove window tints from car. Start at a corner, always the top edge, and work downward. The film should lift without resistance if the adhesive is soft. If it tears, you are pulling too fast. Stop, reapply solvent, and wait.
A common frustration appears when adhesive remains on the glass after the film comes away. This happens with older tints or years of sun exposure. Spray the residue, let it sit, then scrape with a razor blade at a shallow angle. I have rescued more than one window from this.
Wrinkles suggest uneven heat or chemical application. Smooth them as you pull, keeping tension steady.
Check for scratches before you finish. A clean, clear window is the only result that counts.
Post-Removal Cleanup and Care
Removing Adhesive Residue
The film is down, and yet the glass still has stubborn adhesive residue! The tacky layer often lingers in patches, especially along the heating elements. A soft plastic razor paired with a mild solvent removes the residue without scratching the surface, though you must work slowly.
Once the residue yields, switch to a clean microfiber cloth and a glass-specific cleaner. Work in small circles, turning the cloth frequently to avoid smearing the grime back onto the pane.
If your rear window has demister lines, avoid aggressive scraping; those filaments are fragile. A gentle touch preserves them. Mastering how to remove window tints from car includes this final diligence, as leftover residue attracts dust and obstructs visibility.
Cleaning and Polishing the Glass
Polishing after removal is where patience becomes permanent. South African sunlight exposes every imperfection, so treat the glass with a cerium oxide compound. This restores clarity while erasing the faint scratches left by the film’s adhesive.
I apply the polish with a soft foam pad and a dual-action polisher. Work in slow, overlapping passes; the glass should feel warm but never hot. Then wipe the residue with a fresh microfiber cloth, turning it often. A final rinse with distilled water prevents mineral spots.
- Clean the pane with a mild dish soap solution.
- Dry with a dedicated glass towel.
- Polish in small sections of roughly 30 by 30 centimetres.
- Buff until the surface reflects a crisp image.
Mastering how to remove window tints from car truly ends with this polished finish. Clear glass means better visibility and a cabin that feels lighter, even under our harsh coastal glare.
Inspecting for Damage and Next Steps
Once the polish is done, inspect the glass properly. Tint hides damage. Chips, hairline cracks and sand pitting only appear after the film comes off. South African gravel roads make this check non-negotiable.
- Run a bare hand across the pane to feel for chips
- Examine demister lines for breaks
- Check window seals for cracked rubber
- Test the regulator with the pane unobstructed
Demister lines demand special attention when learning how to remove window tints from car. Razor blades and solvent can strip the conductive coating. A broken line leaves a foggy window in the Cape winter, so inspect closely.
For the final step in how to remove window tints from car, choose a fresh ceramic film or keep the glass clear. The inspection tells you whether damage lurks beneath, giving you full certainty before driving on.

0 Comments