
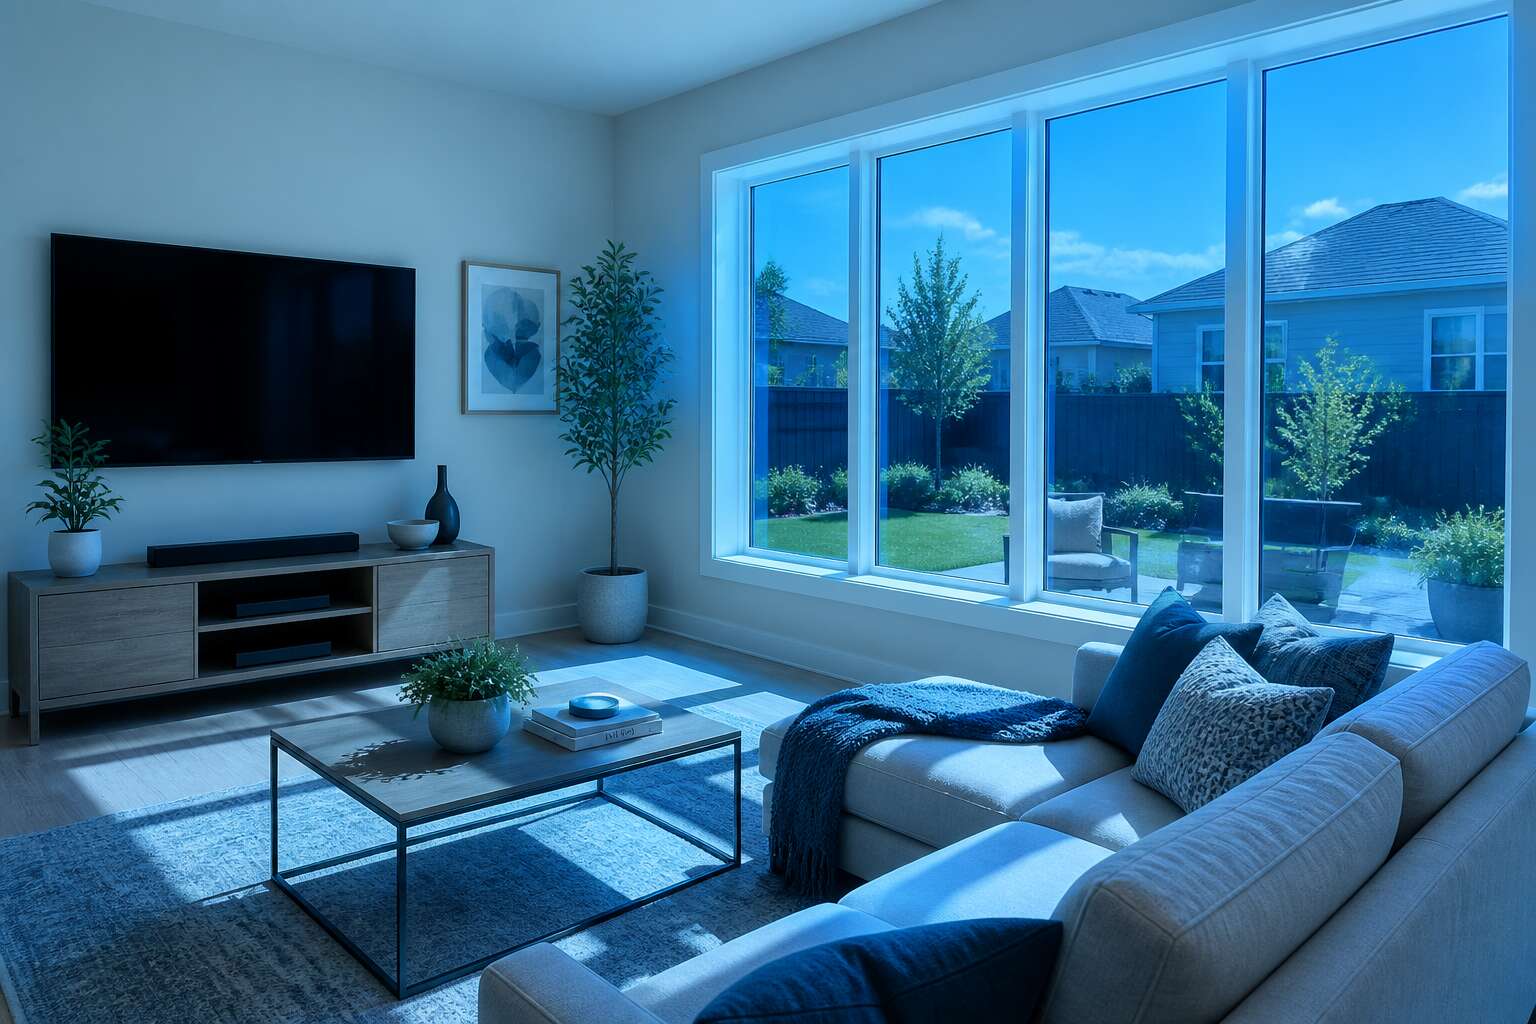
Evaluating Your Home’s Tinting Needs
Assessing Natural Light and Glare Levels
Now, take a deliberate walk through your home at the brightest point of a typical day. This simple observational practice reveals the true character of your interior lighting.
South African homes often contend with intense solar gain, particularly in northern and western facing rooms. A National Solar Radiation Database study shows the country receives over 2,500 hours of sunshine annually. That brilliance can create harsh shadows and visual discomfort.
During this silent audit, observe where sunlight pools on furniture and floors. Notice when the discomfort forces you to squint or close curtains entirely. You will likely discover that your need for [tints for house windows] is not uniform across every room.
– The midday bedroom glare that wakes you brutally early
– The living room television screen washed out by reflected light
– The home office where afternoon sun makes digital work impossible
These records reveal the precise timing of your glare events. The solution you choose must be as dynamic as your daily movement through the space.
Understanding UV Protection and Energy Efficiency
Skin cancer remains the most common cancer in South Africa, with thousands of new cases every year. That risk connects directly to how much ultraviolet light enters your home. Evaluating tints for house windows therefore starts with UV rejection, not temperature.
Quality films block nearly all UV radiation before it reaches your sofa, your curtains or your skin. Energy efficiency follows as the second concern. Unshielded glass lets heat pass through, raising indoor temperatures. I have felt the difference in a Pretoria home office on a hot February afternoon. The room settles within minutes. That relief is noticeable!
Compare these factors:
- UV rejection percentage for protecting fabrics and people
- how much solar heat the glass lets through
- how much natural light still enters
The interplay between UV rejection, heat control and light transmission defines how a tint performs in your home.
Comparing Film Types: Dyed, Metalized, and Ceramic
Selecting a film requires confronting your tolerance for trade-offs. Each type makes a different promise:
– Dyed films deliver a dark aesthetic at a modest price, but they hold solar heat weakly and fade within years.
– Metalized films bounce heat away effectively, yet their metallic layer can disturb radio signals.
– Ceramic films absorb heat without compromising visibility, though the cost reflects that sophistication.
I have watched homeowners choose based on upfront savings, only to replace their tints for house windows when summer exposed the flaw. The material you pick shapes the house’s internal climate. It also reveals what you value when no one is watching. That honesty matters more than any spec sheet.
Considering Aesthetic and Privacy Implications
Your home’s orientation toward the sun dictates more than interior temperature. It shapes what you can see and what others see of you. In South African suburbs, privacy is often a luxury, and the correct tints for house windows provide it without turning your living space into a dark cave.
Walk through each room at three different times of day. Notice where evening light turns glass into a mirror, where a neighbour’s window aligns with your bedroom. The aesthetic outcome depends on how you balance these factors:
- Reflectivity levels that match your exterior walls
- Visible light transmission that keeps interiors bright
- Shade percentages that suit your tolerance for darkness
Privacy is not a fixed condition. It shifts with the angle of the sun, with street activity, with your own movements. A film that looks modest from outside might give you complete certainty inside. That tension between exposure and seclusion is worth sitting with before you commit.
Selecting the Appropriate Film for Each Room
Living Areas and Sunrooms
In Johannesburg, the difference between a north-facing sunroom and a shaded living area can be dramatic. Choosing the right window film starts with how each space behaves throughout the day. For living areas, the goal is often visual comfort without making the space feel dark and closed in. For sunrooms, the priority shifts to managing intense solar gain while keeping the outside world visible.
When I select tints for house windows, I consider the room’s orientation and its use during peak hours. A family lounge that hosts evening television needs a film that reduces glare on screens. A sunroom used for reading demands consistent light without bright patches.
- Living areas often suit films that balance natural light with neutral colour rendering.
- Sunrooms tend to require films that handle heat while preserving clear outward views.
Each room asks for a different level of solar control, and the best tints for house windows respect that distinction.
Bedrooms and Home Offices
Bedrooms and home offices present a different puzzle than social spaces. A bedroom should feel like a sanctuary when the streetlight hums all night, while a home office must stay sharp during Johannesburg’s bright midday hours. Both rooms fail when the light works against them. Selecting tints for house windows here means studying sleep patterns and screen habits.
The key is matching film behaviour to daily routines.
– A shift worker needs near-total darkness for daytime sleep.
– A consultant on video calls needs even light across the face.
– A home office with west-facing glass needs heat control without dimming the view.
Bedrooms often benefit from darker films that suppress early morning glare. Offices do better with lighter ceramic options that manage solar load while keeping screens readable. The right tints for house windows turn both rooms from problem spaces into comfortable, productive environments.
Bathrooms and Kitchens
Bathrooms demand a social discretion that blinds often fail to deliver. A reflective film on the inside creates a one-way mirror when the light is on, so the evening shower remains a private performance. No guest should be treated to the silhouette of the host scrubbing their elbows.
Kitchens face a different foe in reflected glare. Morning light bounces off steel taps and tiled surfaces, creating a wash that obscures the toast rather than illuminating it. The right tints for house windows here reduce that hostile dazzle.
- Frosted films for privacy while inviting daylight.
- Metallic options to push heat away from western-facing counters.
- Neutral grey films to keep the roast chicken looking edible.
Security and Safety Films
Most break-ins occur through glass, and while a determined thief may not be stopped, the right film slows the entry. For ground floor windows and sliding doors, security tints for house windows add a tough layer that keeps shattered glass in place. This deterrent is both psychological and physical. When selecting tints for house windows, consider:
- Film thickness: 4 mil for basic shatter control, 8 mil for serious resistance.
- Attachment systems: anchored films use brackets to delay forced entry.
- Solar performance: combine safety with heat rejection for dual benefit.
In high-risk rooms like a home office storing laptops, the extra cost of an 8 mil product is justified. For upper floor windows, a lighter film may suffice, though still preventing injury from falls. Safety films also reduce harm from spontaneous glass fractures, an underrated hazard in older frames.
Decorative and Patterned Options
Every room telegraphs its own needs. A study with afternoon sun may call for a darker film, whereas a stairwell benefits from a clear safety layer. For decorative flair, choose patterned tints for house windows that echo the style of your home. Frosted reeds or a woven lattice can transform a plain pane into a feature. In bathrooms, opt for moisture resistant options. In kitchens, wipeable surfaces matter more than aesthetics.
Here is a simple guide:
- Assess the room’s primary activity
- Check the prevailing wind and rain direction
- Match the film’s opacity to your privacy threshold
Patterned films also halve the need for heavy drapes, a practical boon for Durban’s humid climate. A true first person note: I replaced my own hallway film with a frosted crest, and the light still dances through without sacrificing seclusion.
Professional vs. Do-It-Yourself Application
Tools and Skills Required for DIY
Applying tints for house windows is not like tinting a car. The glass is larger, the angles are less forgiving, and a misaligned sheet can cost you an entire roll of film. Even professional installers pause before trimming a 1.5 metre pane.
DIY enthusiasts need a spray bottle with slip solution, a hard squeegee, a finishing squeegee, and a sharp blade. A dust-free room is essential. In South Africa, wind brings fine dust through open doors, and every speck becomes a silver bubble under the film.
- Spray solution and two squeegee types
- A sharp utility knife with fresh blades
- A heat gun for curved corners
A heat gun helps shape film around curves, but it causes most mistakes. Professional installers spend hundreds of hours learning the right pressure. For tints for house windows, one air pocket ruins the view. If you are patient and steady-handed, do try it! Otherwise, keep a professional’s number handy.
Step-by-Step Overview of Installation
Most homeowners who attempt a weekend tint job call a professional by Sunday. The tradeoff is precision versus patience. For tints for house windows, a single dust speck becomes a silver bubble that lasts for years. I have watched a neighbour spend a whole Saturday on one pane.
Professionals rely on a thermometer, a fresh blade, and coordinated pressure. DIY kits demand the same tools but not the hours of practice. The installation sequence looks simple, and it is!
- Remove the rubber gaskets and scrape the pane clean.
- Spray slip solution so the film floats.
- Peel the liner and press the film onto the wet glass.
- Run a hard squeegee from centre to edge.
- Trim the perimeter and heat-set the corners.
Yet the difference appears at step four. One incorrect angle traps an air pocket. Professionals charge per square metre and cover their mistakes. When you buy tints for house windows yourself, every flawed sheet becomes your own expense.
Why Professional Installation May Be Worth It
The neighbour I mentioned earlier now studies silver bubbles across his lounge panes. A professional installer charges per square metre because that fee buys the skill to avoid such scars. Tints for house windows demand a steady hand and a practiced eye, and the finished surface shows the difference!
Good installers read the glass before the first cut. They notice the subtle twist in the frame, the slight curve in the pane, the angle of the afternoon sun. Each detail changes how the film settles. This awareness is why tints for house windows perform for years.
- They measure the pane’s squareness before cutting
- They factor in the sun’s path across the room
- They account for the glass’s age and coating
The neighbour’s Saturday effort showed its first bubble within a month. His only option was to call a professional after all.
Post-Installation Care and Curing
The first 48 hours after application define the film’s fate. Tints for house windows are not finished once the squeegee passes. They cure slowly, demanding a patience most DIY owners never expect.
DIY installers often rush this phase. They open windows, wipe surfaces, or let children press fingers to the glass. The adhesive needs time to bond. Professionals treat curing as a discipline, not a waiting game.
Post-installation care follows a strict rhythm:
- Leave the windows undisturbed for at least seven days.
- Use only a soft cloth and mild soap for cleaning.
- Avoid direct sunlight exposure on the freshly applied film.
Yet even careful DIY owners miss the subtle signs. A persistent haze or a faint residue signals improper curing. The difference between a professional and a Saturday attempt shows in how the film ages, beyond the initial appearance.
Warranty and Guarantee Considerations
The warranty attached to tints for house windows separates the professional promise from the DIY gamble. Manufacturers often void coverage on self-installed film, because no certified technician verified the glass or the adhesive bond. A professional installer registers those tints for house windows with the manufacturer, and that activation protects you for the full term. The paperwork alone is worth the difference.
Consider what a guarantee actually covers:
- Peeling edges or bubbling beneath the film
- Optical clarity failures such as persistent haze
- Adhesive breakdown under strong South African UV exposure
DIY film carries no such documentation. The money saved upfront becomes a private burden when defects appear. A failed Saturday project means buying replacement rolls and spending another weekend on a ladder. With professional application, that risk transfers to the installer, who returns to correct any fault without extra invoicing. That quiet accountability, the knowledge that someone remains obligated to the work, is the truest value in any window film purchase.
The Impact on Energy Bills and Comfort
How Solar Heat Gain Coefficient Works
Your home’s thermal equilibrium depends on a metric few people ever notice. The solar heat gain coefficient, or SHGC, ranks how much radiant heat our South African sun pushes through your window film. A low SHGC blocks more of that infrared assault, so your cooling system works less hard.
Comfort follows savings. Rooms facing the afternoon sun remain comfortable throughout the day. With the right tints for house windows, you can hold a steady temperature without the constant hum of an air conditioner. Choosing from available tints for house windows also alters the subtle balance of light and warmth in each room.
- Lower SHGC reduces cooling load directly.
- Moderate SHGC retains heat during winter.
- Proper selection balances both seasons.
In Johannesburg or Cape Town, electricity prices climb each year. The difference between a poor film and a precise one shows up on your statement within weeks, and your comfort shifts immediately!
Insulating Properties of Modern Films
Eskom tariffs have climbed steadily, and each kilowatt hour carries more weight. Modern tints for house windows insulate by reflecting long wave infrared radiation back to its source. This keeps conditioned air inside during summer, reducing the load on compressors. Quality tints for house windows also retain warmth during winter, which matters in Gauteng’s cold nights. In my experience, the result shows up on your monthly statement as a measurable reduction!
Consider what influences that reduction:
– The orientation of the glass
– The existing window frame’s seal
– The film’s spectral selectivity
Double glazing helps, but film applied to existing glass performs a similar function at a fraction of the cost. Single pane windows lose around 40% of heating and cooling energy. A spectrally selective film changes that equation permanently.
Comfort comes from the same mechanism. Rooms stay steadier, without the temperature swings that force thermostats to cycle constantly.
Potential Savings on Cooling and Heating
My first post-tint electricity bill arrived with a number that made me check the meter twice. Tints for house windows trim the kilowatts that leak through single panes, especially in rooms facing the afternoon sun. In Gauteng, the swing between burning days and icy nights turns air conditioners into perpetual motion machines. Film interrupts that cycle. You use less power, and the compressor stops its frantic on off rhythm.
The comfort side is equally tangible. Rooms hold their temperature instead of chasing it. A space stays workable from morning to evening, and you stop adjusting the thermostat like a DJ mixing a track. For homes with older frames, the improvement is even more noticeable.
To gauge your potential:
- Check the largest glass areas first, they dominate losses.
- Measure room temperature shifts across a typical day.
- Compare those numbers after film application.
Everybody notices the quieter, steadier interior. The savings are just the louder reward.
Tax Credits and Utility Rebates
Eskom tariffs have outpaced inflation for years, yet the cheapest kilowatt is the one never consumed. South African homeowners rarely find tax credits waiting for tints for house windows. Municipal utility rebates exist, but most favour solar water heaters and heat pumps. The savings appear directly on the monthly statement. A lounge facing the afternoon sun draws less power during peak hours, and the difference is measurable within one billing cycle.
Rebate programmes differ per metro. Some require an energy audit, others ask for proof of reduced consumption.
- Confirm whether window film qualifies under your local scheme.
- Keep the invoice and two consecutive utility statements.
- Request a compliance certificate from the installer.
Comfort compounds the financial gain. Stable interior temperatures reduce strain on heating equipment during winter evenings, and the home keeps its climate without constant thermostat adjustments.
Seasonal Performance Variations
Summer afternoons punish exposed glass. Tints for house windows stop the worst of that radiant assault, but winter demands a different performance. The same film that blocks solar gain can also hold warmth inside, reducing the evening chill that pushes heaters to work harder. Across a full year, my electricity bills show a pattern: the peaks smooth out, and neither season spikes as sharply. The comfort follows suit. Rooms feel less stuffy in January and less drafty in July. That seasonal balance matters more than a single month’s saving. It changes how the home responds to the sun’s angle and cloud cover, keeping temperatures within a narrower range. The result is a home that asks for less energy every month.
Long-Term Maintenance and Durability
Cleaning Do’s and Don’ts
A single cleaning mistake can ruin a decade of protection. Homeowners frequently overlook the routine care that extends the lifespan of tints for house windows. A quality ceramic film easily survives fifteen years, but only when you respect its surface. Dust and grime accumulate daily, and harsh chemicals degrade the adhesive over time.
For cleaning, the rules are simple. I have seen too many films fail due to basic neglect. Use a soft cloth and a mild soap solution. Avoid ammonia based sprays, as they cause the film to bubble. Keep sharp objects away!
- Use a microfiber cloth for all wiping.
- Choose a neutral pH cleaner without abrasives.
- Wait at least thirty days before cleaning new installations.
Water pressure from a garden hose is fine, but a pressure washer is not. The seal at the edges determines durability. Always wipe from top to bottom to prevent streaking.
Signs Your Film Needs Replacement
Every film has a breaking point. I have watched too many homeowners miss the moment. The same sun that delivers warm light through your windows also degrades the adhesive holding tints for house windows in place. Five years of Cape Town summer can leave edges peeling where they once seemed bonded to the glass.
Durability is not a fixed promise. The signs appear slowly. A subtle purple hue where the film once looked neutral. Tiny bubbles that grow after a hot afternoon. A scratch that never heals. These indicators accumulate until you see the truth in the glass.
- Peeling along the edges beyond a few millimetres
- Bubbling that remains after pressing
- Scratches that weaken the film’s integrity
Replacement is the honest response when tints for house windows no longer perform their function. The film has done its work. You owe it a proper retirement, not another season of pretending.
Lifespan Expectations by Film Type
The lifespan of window film is not a fixed number. It is a negotiation between the material and your environment. I have seen dyed tints for house windows surrender their colour within six years under Durban’s sun. Metalized films hold their ground for a decade, though salty sea air can test their edges. Ceramic films are the marathon runners, easily reaching fifteen years if you respect their limits.
Maintenance decides those numbers! A soft cloth and a mild soap solution are the only tools you need. Sharp scrapers and harsh chemicals are the saboteurs. They weaken the adhesive, inviting the bubbling and peeling we discussed earlier.
Dealing with Bubbles and Peeling Edges
The first sign of trouble with tints for house windows often appears as a small silver blister along a sun-warmed edge. That bubble is not a cosmetic flaw. It is a pocket where adhesion has failed, and it will grow if ignored.
Peeling edges tell a different story. They occur when the film’s adhesive has been compromised, usually by improper cleaning or excess humidity. Once the edge lifts, dust and moisture get beneath it, forcing the separation further.
- Press small bubbles down with a soft cloth while the film is still fresh.
- Puncture larger bubbles with a sterile needle and smooth them flat.
- Trim lifting edges with a sharp blade, then reseal the area with gentle heat.
These fixes buy time, but they are temporary. A film that bubbles repeatedly or peels across its face has reached its limit. Replacement becomes the honest choice, and avoiding scrapers during routine care will extend the next set of tints for house windows.



0 Comments